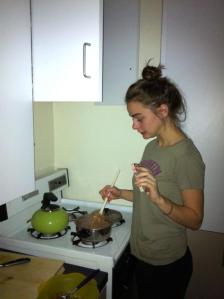
Red Wine Chocolate Cake

Standard

IMG_1808

In middle school, Georgia and I used to make homemade truffles to give to our friends around the holidays. Actually, Georgia started this practice—I remember being in awe of her cocoa-dusted truffles neatly packaged in tiny Chinese takeout boxes that she gave me one Christmas. I thought it was a genius idea to give out homemade treats and started doing the same. Some years I made chocolate peanut butter cups, packaging them in cheap holiday mugs for my family. They were probably melted by the time the recipients opened them, but I remember being quite pleased with my handiwork.

Despite living in New England all my life, I think I have a bit of Southern girl in me, as I believe that the best way to show people you care about them is by cooking for them. A simple omelet, a box of dark chocolate truffles, and a birthday cake all become more special if you’ve made them yourself.

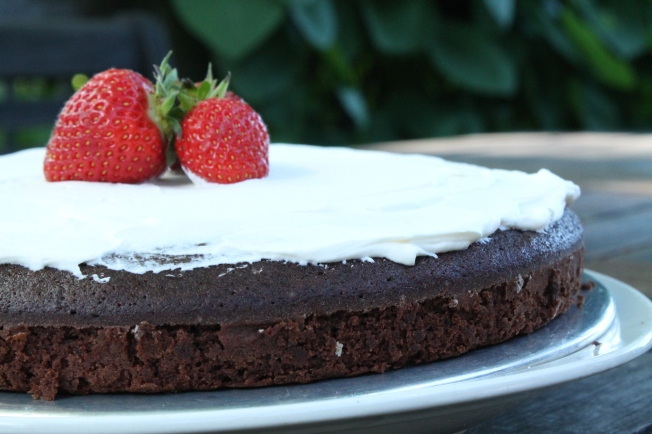
Sophie, one of our closest friends, recently turned twenty. To celebrate her special day, we gathered and feasted upon a truly decadent red wine chocolate cake, topped with a mascarpone cream and fresh, juicy strawberries. Although it was simple to prepare and not grandiose in the least—the cake is only one layer—it was one of the best chocolate cakes I have ever eaten. The cake is rich, chocolaty and punctuated by pockets of deep red wine flavor, but perfectly complimented by the cool cream and sweet strawberries. It’s sophisticated enough to serve after a formal dinner, but easy enough to prepare that you’ll want to make it for every occasion.

If you haven’t thought of something to get your dad for Father’s Day, I recommend making this cake. It requires no more than an hour of your time, a few ingredients, including good red wine, and endless love.

IMG_1766

Red Wine Chocolate Cake
Adapted from Smitten Kitchen

For the cake
6 tablespoons unsalted butter, at room temperature
3/4 cup firmly packed brown sugar
1/4 cup granulated sugar
1 large egg & 1 large egg yolk, at room temperature
3/4 cup red wine
1 cup + 1 tablespoon all-purpose flour
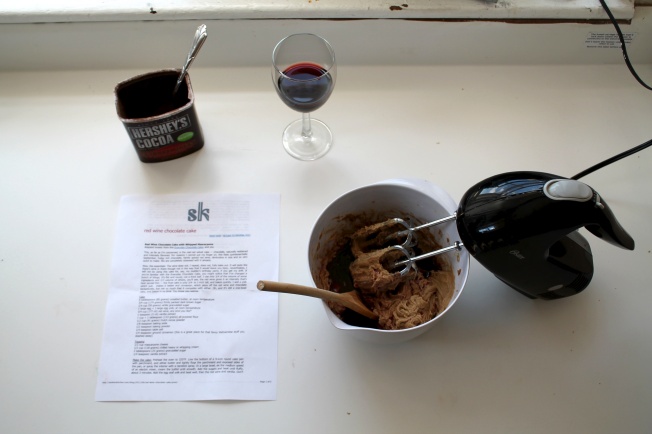
1/2 cup Dutch cocoa powder (we used Hershey’s Special Dark)
1 teaspoon vanilla
1/8 teaspoon baking soda
1/2 teaspoon baking powder
1/4 teaspoon salt
1/4 teaspoon cinnamon

For the topping
1/2 cup mascarpone cheese
1/2 cup heavy cream, chilled
2 tablespoons powdered sugar
1/4 teaspoon vanilla extract

  1. Preheat oven to 325. Line the bottom of a 9-inch round cake pan with parchment paper, then butter and flour both the sides of the pan and surface of the parchment.
  2. In a large bowl, beat the butter until smooth, then add sugars and beat until light and fluffy. Add the egg and yolk, beat well, then add the wine and vanilla. The mixture might look a little lumpy, but fear not, this is totally normal and your cake will be fine.
  3. In a smaller bowl, whisk together the flour, cocoa, baking soda, baking powder, salt and cinnamon. Sift the dry mixture over the wet, then beat until combined.
  4. Pour the batter into the prepared pan and smooth the surface with a rubber spatula. Bake for 25-30 minutes, or until a toothpick inserted into the center of the cake comes out clean. Cool in the pan for 10 minutes, then remove the cake from the pan and cool on a wire rack.
  5. To make the topping, beat together mascarpone, heavy cream, powdered sugar and vanilla until soft peaks form–don’t over-beat. Smooth over the surface of the cake and garnish with fresh strawberries or raspberries.
IMG_1814

Mini Quiche Tartlets

Standard

IMG_1763

Why hello! We’re back!

It has been an almost unprecedented length of time between blog posts–Caty, as semi-avid readers of the blog will know, has posted every once in a while about her concoctions in her dorm kitchenette, but the two of us have not blogged together since Christmastime. Half a year, nearly! This is due to the fact that geography has separated us for much of this semester– she’s been kicking butt at school in NYC and writing for  NYU Spoon, while I was traversing Peru and volunteering at an orphanage. (I decided not to dedicate an entire post to Peruvian cuisine as it was not my favorite, but you all might be delightfully disgusted to know I sampled both alpaca and guinea pig meat while I was there, as well as some more appealing empanadas and tamales.)

However, we’re both back in our little town, and though we’ve been sad to end our years’ adventures I think it’s safe to say one of the upsides of summertime is going to be blogging more frequently and being able to enjoy each other’s company again. Summer is a beautiful time to cook; one of my favorite things to do this time of the year is pick over fruit and veggies at farmer’s markets and make something delightful to eat on the porch on a sunny late afternoon. So, rest assured we will be bringing you lots of treats to look at (and make, if you want!) in the upcoming months.

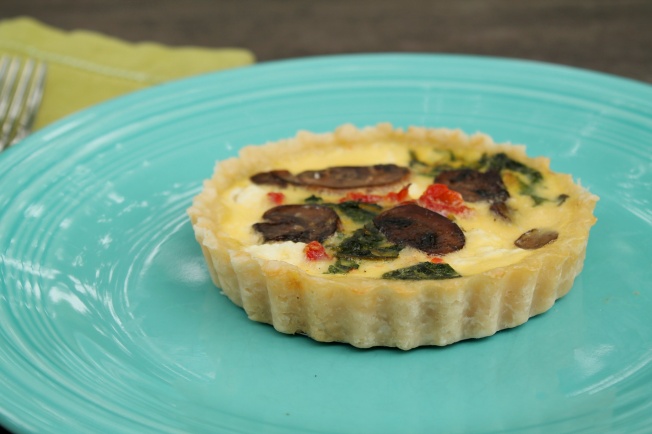
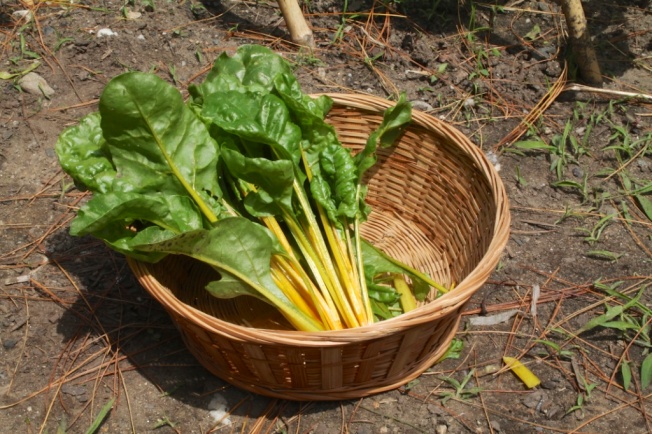
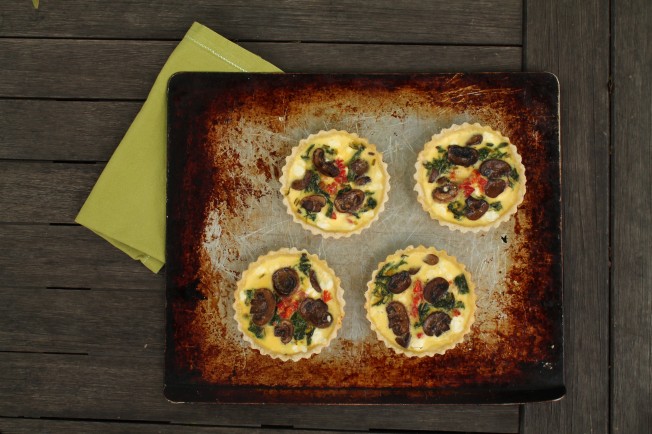
We kicked off our summer cooking a couple days ago with these scrumptious mini quiches. Quiche has been one of my favorite foods since I was little, partially since I am a sucker for anything with a pie-like crust, and these little guys were no disappointment. Quiche is wonderful because you can put really anything you like in it and it’ll still taste good. Most kinds of cheese and meat bits work great, as well as virtually any vegetable. We ended up making these with goat cheese and a small assortment of veggies (sundried tomatoes, swiss chard from the garden, and mushrooms) and they were delectable. The crust is buttery and couldn’t be easier to make; we used the same reliable 4-ingredient dough recipe we’ve been counting on for years now. It’s the perfect summer snack or meal and so easy and adaptable. Enjoy.

IMG_1733

Mini Quiche Tartlets

1 recipe pie dough
2 tablespoons olive oil
1 bunch  Swiss chard, stems and leaves divided, both chopped
1 clove garlic
¼ cup sundried tomatoes, minced
¼ cup mushrooms, sliced and sautéed if desired
3 eggs
1 cup milk
2 ounces goat cheese, divided

  1. Preheat oven to 350. Press pie dough into four greased mini tart/quiche pans, poke with a fork a couple of times, and cover with aluminum foil. Fill aluminum foil with pie weights or dried beans and bake for 10 minutes. Remove the aluminum foil/pie weights/beans and bake for another 5 minutes. Let cool completely.
  2. Meanwhile, prepare the chard. Heat olive oil in a skillet over medium heat and add chopped Swiss chard stems and a dash of salt. Cook until softened, about 5-7 minutes.
  3. Mince the garlic with another dash of salt. Add garlic and chard leaves to the skillet and cook another 5 minutes. Remove from heat and cool.
  4. In a medium bowl, beat eggs and milk with a wire whisk. Season with salt and pepper.
  5. After the crusts have cooled, divide 1 ounce of goat cheese between the four crusts, then add chard, tomatoes and mushrooms. Top with the remaining goat cheese. Pour the egg mixture on top of vegetables.
  6. Bake the quiches at 350 for 20-25 minutes, or until set.

IMG_1751

Ultimate Lasagna

Standard

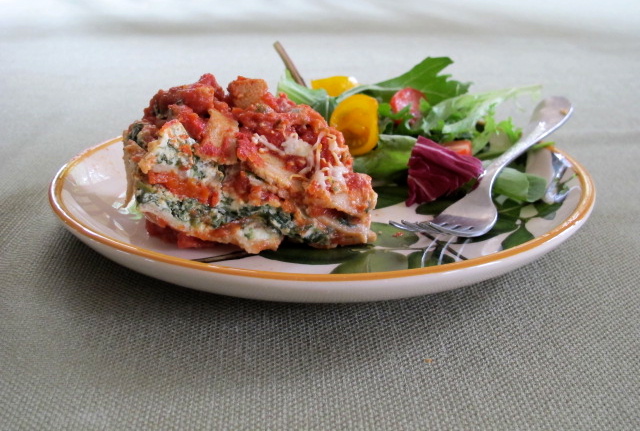
So, I’m not really sure what to call this dish. “The Best Lasagna Ever” is a bit subjective, right? “Roasted Red Pepper, Mushroom and Spinach Lasagna with Whole Wheat Pasta” sounds like a carnivore’s worst nightmare and fails to mention the chunks of Italian-style chicken sausage simmered into the sauce. “Homemade Lasagna” doesn’t sound right either. If I’m giving you a recipe for it, isn’t it homemade by default?

Perhaps I should just tell you about this “Ultimate Lasagna,” a carb and cheese-lovers favorite casserole that I created from many different recipes. It features layers of homemade chunky tomato sauce, homemade whole wheat pasta, homemade ricotta cheese blended with sautéed spinach, roasted red peppers and mushrooms and a generous helping of a combination of smoked mozzarella and regular mozzarella. It sounds complex, like a fan of Old English literature, but it’s not. It’s perfection in casserole form, if I do say so myself.

The great part about this dish is that you don’t have to make every component from scratch. I probably wouldn’t have made my own pasta, ricotta and sauce and roasted my own red peppers except for the fact that I am on spring break and nobody’s around, so the kitchen has become my best friend. If you’re pressed for time, you can just as easily use prepared ingredients, or prepare the sauce, ricotta and veggies a couple days beforehand. The components are pretty easy to make, even the pasta–but it all takes time. Fortunately, I think the finished product is well worth your time.

IMG_0223

Ultimate Lasagna

Ricotta Sauce
1 recipe ricotta (or 1 15-oz container)
6 oz fresh spinach
1 tablespoon olive oil
1 egg, lightly beaten
2 tablespoons grated parmesan cheese
Salt & pepper

Tomato Sauce
1 recipe tomato sauce (I added 1/2 can tomato paste to thicken)
2 chicken, turkey or regular sausages (I used Italian-style chicken)

Vegetables
2 roasted red peppers, diced
2 Portabella mushroom caps, stem & gills removed, diced
1 tablespoon olive oil
Salt & pepper

Whole Wheat Noodles
1 1/2 cups whole wheat pastry flour (or, 1 cup wheat & 1/2 cup white)
1 teaspoon salt
2 eggs
2 tablespoons water

To Assemble
1 cup shredded mozzarella cheese (I used 1/2 regular mozzarella and 1/2 smoked mozzarella)

  1. Add 2 diced sausages to tomato sauce and simmer for 20 minutes. Remove from heat.
  2. In a skillet over medium heat, heat 1 tablespoon of olive oil, then add spinach, salt and pepper. Saute until the spinach is wilted. Let cool, then mix in a medium bowl mix together ricotta, spinach, egg, parmesan and season to taste with salt and pepper.
  3. In the same skillet, heat a tablespoon of olive oil over medium heat. Add mushroom pieces and sauté about 5 minutes, or until soft. Season to taste with salt and pepper.
  4. Preheat oven to 375. Meanwhile, prepare the noodles.

For Noodles:

  1. Mix together flour and salt in a shallow dish. Make a well in the center of the flour and add egg and water.
  2. Beat the egg and into the flour with a fork until the dough comes together, then use your hands to knead it. Roll into a ball and let rest for 20-25 minutes.
  3. Divide the dough into 9 even pieces and roll each piece into a 9×3″ rectangle. Place the noodles aside, storing in 3 layers of 3 noodles. Cover each with a piece of damp paper towel.
  4. Bring a pot of salted water to a boil.

To Assemble:

  1. Spread 1/3 of the tomato sauce on the bottom of a 9×9″ baking dish.
  2. Place three noodles in the pot and boil about 30 seconds. Remove from the water, rinse under cold water, pat dry, and layer on top of the tomato sauce.
  3. Spread about 1/2 of the ricotta mixture over the noodles, followed by 1/2 of the peppers and mushrooms, 1/3 cup of mozzarella and then another 1/3 of tomato sauce.
  4. Repeat the process to make another layer–you should have used up the peppers/mushrooms and ricotta and have 3 more noodles, 1/3 tomato sauce and 1/3 cup mozzarella remaining.
  5. Boil the last noodles and layer on top of the tomato sauce. Spread the remaining tomato sauce on top then sprinkle with the remaining mozzarella cheese.
  6. Place an oil-coated piece of aluminum foil over the lasagna and bake for 20 minutes, or until the sauce is bubbling. Remove the foil and bake for another 30 minutes, or until the cheese is lightly browned. Cool 15 minutes before cutting & serving.

Adapted from Chow and Naturally Ella

Homemade Ricotta

Standard

I have returned home for spring break and there isn’t much to do, so I’ve been doing a lot of cooking and thinking about cooking. This week is a perfect time to try some food projects I’ve been hoping to work on. I want to master the multiple-day, highly involved croissant recipe from the Bouchon Bakery cookbook, but unfortunately the recipe calls for diastitic malt powder and after visiting at least five grocery stores in the state, I have come to the conclusion that it is not sold in RI. Which is a shame, because in the city I can walk two blocks to Whole Foods and they have it. Oh well, another time.

Although I cannot share the croissants, I do have something else to share with you–homemade ricotta! Tomorrow I’m planning on making a fully homemade lasagna (because I actually have time for that) with homemade pasta, sauce and the ricotta. Ricotta is surprisingly easy to make and only requires four ingredients, so if you’ve never tried making it, you should definitely do that. Like, right now.

I can’t say much about the store-bought kind, because I rarely use ricotta, but judging by the taste of the homemade version I’m almost 100% sure that it’s 10 times better. It’s super-fresh and flavorful and probably cheaper to make than to buy. Oh, and it takes less than an hour from start to finish. Are you convinced yet?

A couple weeks ago I tried my hand at homemade mozzarella with the Community Agriculture club at NYU. Making mozzarella is a bit more involved than ricotta; it requires less common ingredients like citric acid and rennet and there are more steps. If you want to try making cheese but are apprehensive, I recommend making ricotta before you move onto mozzarella. I highly recommend trying your hand at cheese making at least once in your life. Fresh cheese is unbelievably tasty and tastes even better when you know you’ve made it.

This particular ricotta recipe (from Ina Garten) requires only four ingredients: whole milk, heavy cream, kosher salt and white wine vinegar. Try and get the highest quality ingredients you can; you will end up with a higher quality cheese. You also need cheesecloth, which is not hard to come by and can be reused if you’d like.

The first step in ricotta-making is to prepare your strainer. Place a sieve or colander over a large bowl and dampen two pieces of cheesecloth. Layer the cheesecloth over the sieve and set aside.

Next, pour 4 cups of whole milk and 2 cups of heavy cream into a large pot and stir in a teaspoon of kosher salt. Bring the mixture to a full boil over medium heat while stirring occasionally. It could take up to 20 minutes for your mixture to boil, but don’t rush it. Good things take time! When the mixture is boiling, remove it from heat and stir in 3 tablespoons of white wine vinegar. Let the mixture sit for 1-5 minutes until it curdles. The mixture will separate in to curds (the chunky pieces that float to the top) and whey (the watery mixture underneath). If you tip the pot a bit, you’ll be able to see the layers separate.

Pour the mixture into the cheesecloth-lined sieve and let it sit for 20-25 minutes or longer, depending on how thick you’d like your ricotta to be. Every couple minutes, discard the whey that collects in the bowl. You can either throw this in the sink or use it in place of water in cooking rice or baking bread. This website has a bunch of ideas if you’d like to re-purpose your whey. I tossed most of it (and feel a bit wasteful, I will admit) but reserved a little to mix into my dog’s food, like a canine cereal. She seemed to love it.

Once the ricotta is to your desired consistency, transfer it to a container and cover the surface with a layer of plastic wrap and then cover with a tightly-fitting lid. The cheese will keep for 4-5 days in the refrigerator.

This may look like a super-involved process, but it’s not! I am so happy with the outcome of my ricotta and cannot wait to use it in a lasagna. I topped some crusty toasted bread with ricotta and a bit of honey and it was incredible. I’m trying to resist eating the entire batch right now.

If you have an hour, I suggest you go make some homemade ricotta. You will not regret it.

image_1363727500241946

The recipe comes from Ina Garten on foodnetwork.com

Oh, and if you’ve read this far, I’d also like to share that I’ve been writing some dining articles (as well as some others) for the features section of NYU’s Washington Square News. So I haven’t had much time to post while at school. If you’re interested, you can see my articles here.

Happy St. Patrick’s Day!

Image

Happy St. Patrick's Day!

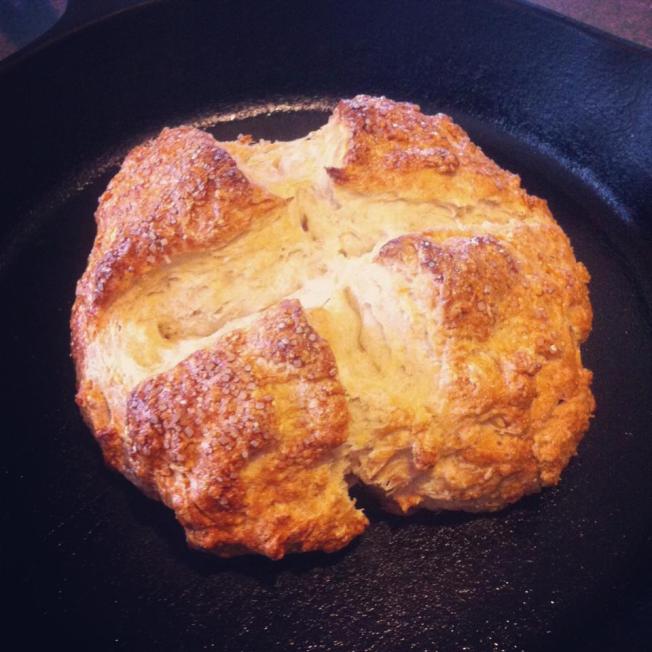
It’s never too late to celebrate St. Patrick’s Day! Make a batch of this super-easy Irish Soda Bread, toast it and slather with a pat of butter and cinnamon honey or jam.

If you don’t have buttermilk on hand, you can substitute whole milk plain yogurt thinned with a bit of milk.

The recipe from The Kitchn: http://bit.ly/WsC1IS

(Also please excuse the iPhone-quality photo. I’m on spring break and left my camera at school. Oops.)

Bacon & Brussels Sprouts Skillet Pizza

Standard

After a long and seemingly endless winter break, I am back at college in the city. I took a small cooking hiatus (unless you count instant oatmeal as cooking) in order to settle into second semester, but here I am to share with you something Wright Time for a Schnack rarely features–a meal, not dessert!

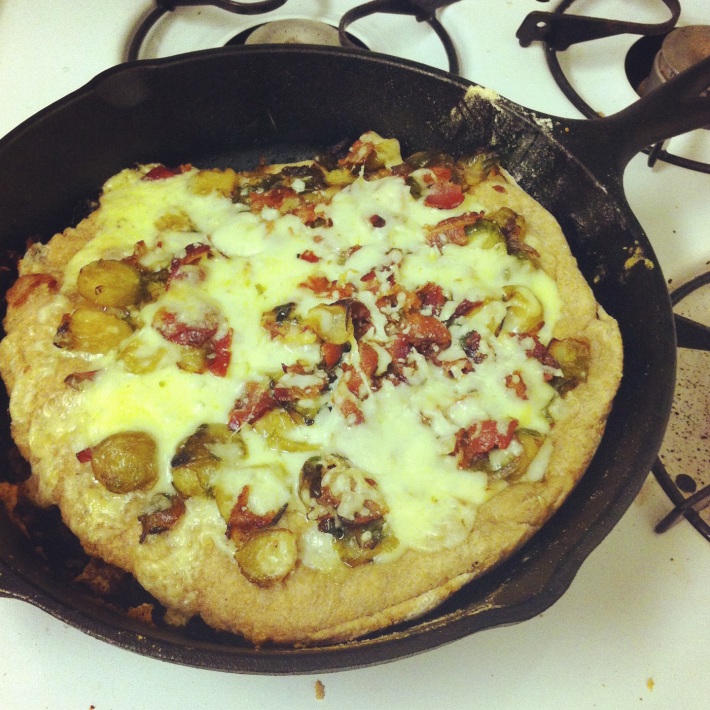
I will admit that I’m quite partial to baking, but I do enjoy cooking myself a nice meal every now and then. When I saw this bacon and brussels sprouts pizza on How Sweet It Is, I knew I just had to try it. It has all the makings of a perfect meal: brussels sprouts are one of my favorite vegetables (especially if they’re roasted), and everything’s better with bacon. Oh, and cheese. Enough said.

My roommate Hannah and I spent Saturday afternoon at the Union Square Greenmarket in search of fresh ingredients for our pizza. It was fantastic to see the greenmarket open post-Nemo. Less than fantastic, however, was the amount of watery slush we had to trudge through to get there. Oh, the joys of the New York City in the snow.

Unfortunately, this pizza isn’t too college budget-friendly. However, if you’re splitting the cost of ingredients with someone else, and you have leftovers for lunch tomorrow, and you taste the sheer genius of the ingredient pairing, you forget that paid almost $10 for bacon. And thanks to the wonderful cheese man at Whole Foods’ fromagerie (did anybody know they called their cheese shop a fromagerie? They do. It was printed on the cheese label), I was able to get exactly the right amount of cheese that I needed for this pizza. Apparently you can ask for a specific amount of cheese at the cheese counter, and they will cut it to size for you. I did not know this before. My life has changed for the better.

Let me forewarn you that the skillet pizza method is not foolproof, especially if you don’t have the proper ingredients (like a pizza peel, or a broiler in your oven). Albeit a couple mishaps and a crust that was overdone in a few spots, we ended up with a tantalizingly delicious pizza. The skillet pizza method is wonderful because it takes only minutes to cook–if your oven is equipped with a broiler.

Basically, what you need to do is heat a skillet under a broiler or on the stovetop for ten minutes until it is hot. Don’t touch it or else you’ll sear your fingers off and that would not be fun. Then, after artfully layering ingredients on the pizza dough, which should be set atop a well-floured pizza peel (or, in our case, a wooden cutting board), you’ll want to slide the pizza onto the skillet. This is where we had a bit of trouble–some of the ingredients tumbled into the skillet and started cooking on contact. If this happens and you’re quick enough, you’ll be able to position the pizza in the skillet and scrape the melted cheese off of the surface and onto the dough, wielding only a spatula and oven mitt. The oven mitt is necessary, as this is dangerous stuff. After you have settled the ingredients back onto the dough and had a quick tantrum about how sad and un-artistic the arrangement of the ingredients are, you will need to act quickly and place the skillet under a broiler for only about 2 minutes. Yes, 2 minutes. Unless you don’t have a broiler, in which case you will put the skillet on the top rack of your oven heated to 400 and hope the crust doesn’t overcook.

Drizzled with balsamic glaze (Hannah recently returned from Italy and brought back a bottle of balsamic crema, which is thick balsamic syrup. It’s amazing), this pizza is complete. The balsamic balances the salty bacon, Brussels sprouts and cheese beautifully. Unfortunately, because of our lack of broiler, the crust and cheese didn’t get that toasty look, but the pizza was delicious nonetheless. I recommend serving it with a side salad composed of whatever you can find in your fridge and pantry–red peppers, tomato, avocado, nuts, dried fruit–to balance the heartiness of the cheese. And don’t be surprised if someone walks into your room, drawn by the heavenly scent of melted cheese.

For the recipe, head to How Sweet It Is.

Image

Meyer Lemon Squares

Standard

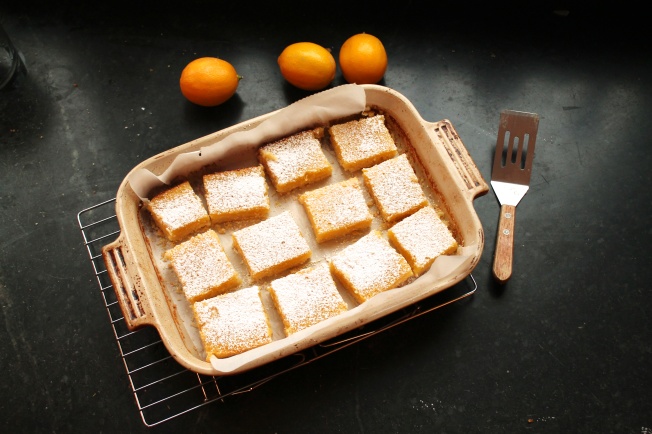
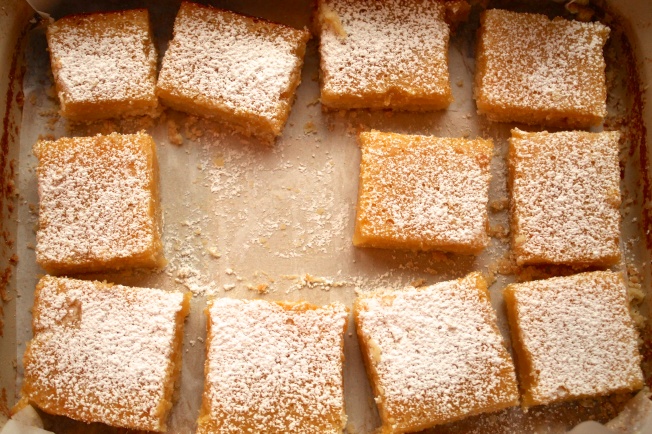
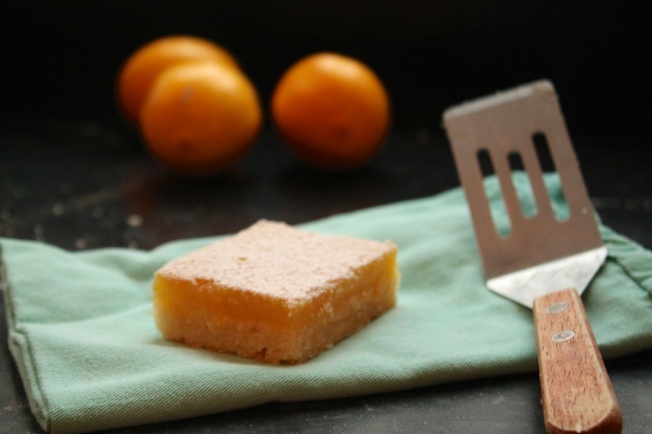
There are two things I attribute to a successful grocery shopping trip: Not seeing anybody I know from high school (to be honest, small talk is not my favorite) and finding obscure products like Meyer lemons. I suppose Meyer lemons aren’t that obscure, but in recent winter seasons I’ve begun to notice their popularity. I was quite excited to see a bag of these little yellow-orange wonders. Apparently, Meyer lemons are a cross between a lemon and a Mandarin orange, so they’re sweeter than your average lemon. (Georgia volunteered to try one. The verdict: sweeter, but not pleasant to eat by itself.)

The lovely thing about citrus in the winter is that it can really brighten a dreary day. We happened to make these on a cold/snowy/rainy day (is there any worse combination?!), which made the day a little bit nicer. If you’re experiencing the winter blues, I recommend these happy lemon squares. Take advantage of citrus while it’s still in season.


IMG_1244

After my Meyer lemon discovery, I excitedly suggested to Georgia that we make lemon squares. She quickly agreed, then proceeded to tell me that at seven years old, she made up a joke about lemon squares.

“Where do desserts go on Saturday nights?”

“To the lemon square dance!”

This is why we are friends.

IMG_1251

A couple tips for making these: always zest the lemon before juicing to keep things neat. If you want a thicker lemon layer, head over to Smitten Kitchen, where we got the recipe, for an thicker option. We mistakenly baked these a bit too long so the filling wasn’t as soft as it should have been, but delicious nonetheless. Make sure you pay attention to the bars while they’re in the oven, no matter how addicting Girls is.

Meyer Lemon Squares
Adapted from Smitten Kitchen

For the crust
1/2 pound (2 sticks) unsalted butter, at room temperature
1/2  cup sugar
2 cups all-purpose flour
1/8 tsp salt

For the filling
4 large eggs at room temperature
1 2/3 cups granulated sugar
1 tablespoon + 1 teaspoon Meyer lemon zest
2/3 cup freshly squeezed Meyer lemon juice
2/3 cup flour

Confectioners’ sugar, for dusting

  1. Preheat the oven to 350 and line a 9 x 13 inch baking dish with parchment paper or grease & flour the dish
  2. For the crust, cream butter and sugar until light and fluffy. Whisk together flour and salt and add to the butter mixture while the mixer is running. Dump the dough onto a well-floured board and gather into a ball. Flatten the dough and press into the baking sheet; build the crust up 1/2 inch on the sides of the dish. Chill.
  3. Bake the crust for 15-20 minutes, or until lightly browned. Let cool on a wire rack.
  4. For the filling, whisk together eggs, sugar, lemon zest, juice and flour. Pour over the crust and bake about 20-25 minutes. Let cool to room temperature and dust with confectioners’ sugar.

IMG_1247

Dirty Chai Pancakes with Spiced Caramel Sauce

Standard

My friends, Wright Time for a Schnack has officially reunited! We have meandered our way back to snowy little Rhode Island from our respective corners of the world. This morning, Caty and I happily cooked in the same kitchen for the first time in over four and a half months. We might be a little more street-smart, city-slick, and worldly, but we are still delighted to return to our hometown and the brilliant friends and family who inhabit it.

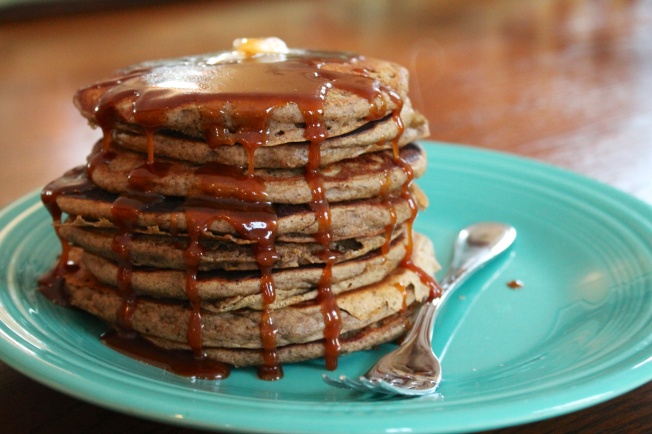
On this chilly winter morning, both of us recovering from colds, Caty and I concocted a delightful warm breakfast of dirty chai pancakes with a sweet caramel sauce drizzle. For those not in the know, dirty chai is a surprisingly toothsome flavor mix of chai spice and espresso.

They were enormously satisfying. One of the many lovely things about pancakes is that they are extremely adaptable–one can put any number of ingredients in pancakes and they transform to suit a variety of occasions. In this instance, our occasion was our blogging reunion, and the newly-born year of 2013. Listen, if you don’t have any occasions to celebrate with food, I encourage you make one up on the spot.

For those who, unlike me, aren’t as fond of sugar, I’d recommend you cut back on the amount of the caramel sauce.  Caty and I ate no more than half of what we had made–the sauce-to-pancakes ratio was quite high.

These were a lovely treat, and the best part was enjoying each other’s blogging company after so long apart! There’s a sole person in this life who genuinely understands my need to dance like a lunatic in the kitchen, and that is the one and only Caty Schnack.

Happy New Year, everybody!

IMG_1220

Dirty Chai Pancakes with Spiced Caramel Sauce
Adapted from Cooking for Seven

For the spiced caramel sauce
1 cup sugar
6 tablespoons unsalted butter, cut into 6 pieces
1/2 cup heavy cream at room temperature
1/4 teaspoon sea salt
1/4 teaspoon cinnamon
A pinch of each cloves, nutmeg, cardamom and ginger

For the pancakes
1 1/3 cup milk
2 teaspoons white vinegar
3/4 cup whole wheat flour
1/2 cup white flour
2 teaspoons baking powder
1 teaspoon baking soda
Pinch of sea salt
1 tablespoon finely ground espresso (we used Cafe Bustelo espresso-style coffee)
1 teaspoon cinnamon
1/2 teaspoon ginger
1/4 teaspoon cardamom
1/4 teaspoon nutmeg
Pinch of cloves
2 tablespoons maple syrup
1 tablespoon melted butter
1 teaspoon vanilla extract

  1. For the caramel sauce: Place sugar in a heavy saucepan over medium heat. Stir vigorously until completely melted, then add butter one piece at a time. Slowly pour in heavy cream while continuing to whisk. Remove from heat and add salt and spices. Set aside.
  2. Combine the milk and vinegar in a measuring cup and set aside to curdle for five minutes.
  3. Sift together the dry pancake ingredients. Add the curdled milk, maple syrup and vanilla and stir until just combined. The batter might be liquidy; let it sit for a couple minutes and it will thicken up.
  4. Heat a heavy skillet and coat with non-stick cooking spray or butter. Drop batter onto skillet using a 1/3 cup measure and cook until bubbles appear on the sides of the pancake, 1-2 minutes. Flip and cook for another 1-2 minutes until cooked on both sides.
  5. Serve with caramel sauce and enjoy!

Mini Veggie Frittatas and Procrasti-baking

Standard

It’s the most wonderful time of the year, my friends.

Yes, it is the holiday season. But it’s also finals season. Which actually isn’t so wonderful. I’ve noticed that students people choose to spend their finals season locked away in the library at all hours of the day and night, eyes glued to shiny MacBooks, gripping a red Venti Starbucks cup in one hand and propping their head up with the other. During finals season, instances of public napping increase tremendously, as do sightings of zombies in all academic buildings and in the mile-long line at Starbucks.

Thankfully, my course load this first semester isn’t as daunting as, say, the girl sitting next to me in the library yesterday–as I reviewed the differences between cakes and cookies, she seemed to be struggling with some sort of convoluted accounting formula. Oh, the joys of being a freshman Nutrition & Food Studies student.

This past weekend, I was struck by an illness called procrasti-baking. It’s caused by a combination of dread, stress, monotony and an excess supply of eggs, butter and flour. While some of my fellow students decided to study overnight, I instead chose to bake at all hours of the day.

Last week, I spent two days baking chocolate gingerbread cookies. On day one, I prepared the batter, but there was a final paper looming over my head, so I didn’t cut and bake the cookies until the next day. So I found myself, in the wee hours of Wednesday morning, rolling, cookie-cuttering, baking and sampling chocolate gingerbread cookies. Protip: If you don’t have a rolling pin, a great way to roll out dough is to press it between two sheets of parchment paper and roll a round cup over it. On Sunday I baked a giant browned-butter skillet cookie for my wonderful floormates. It was quickly devoured. I didn’t end up getting a  picture, but feel free to imagine the grandeur of a giant, warm cookie. Mmmmmm.

IMG_1859

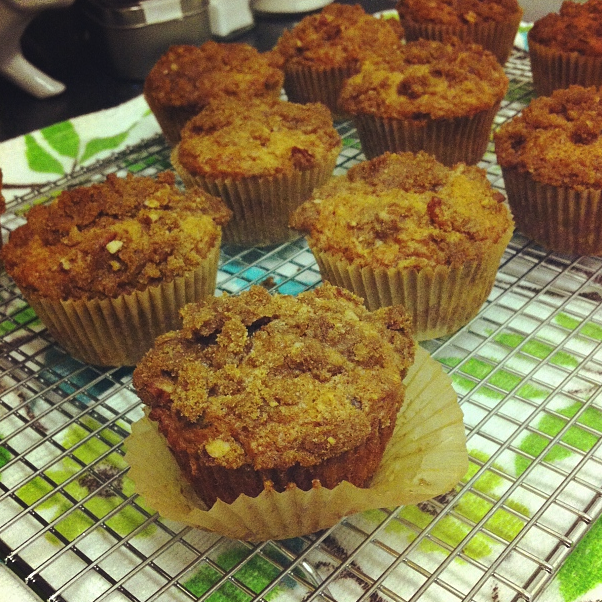
And then, last night, I decided to make some banana crumb muffins, with the addition of chocolate chips, cinnamon and nutmeg and chopped-up pecans in the crumb topping. I knew I had overdone the baking when one of my roommates, drawn to the kitchen by the scent of fresh-baked muffins, exclaimed, “Caty, you’re baking something again?!” Thankfully, nobody’s (seriously) complained yet about the amount of baked goodies I have been producing. I just like to think I’m making up for the five and a half weeks that we’ll be apart during winter break.

Georgia and I made these same muffins a couple months ago, and I still can’t believe how delicious they are. I also can’t believe that I just ate one and a half while typing this. Please, somebody, take my baked goods away from me.

IMG_1888

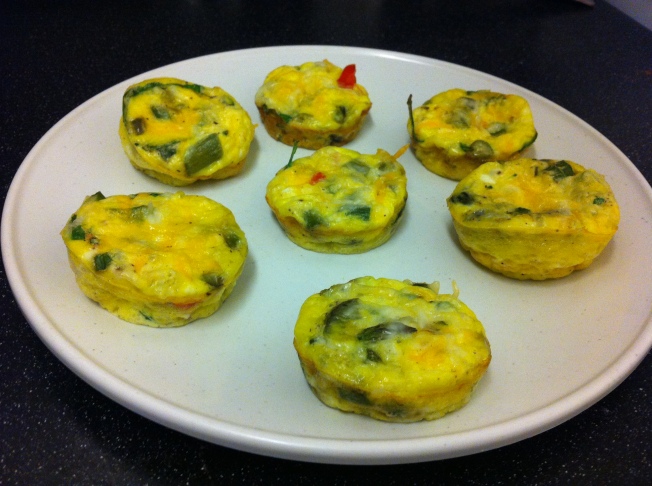
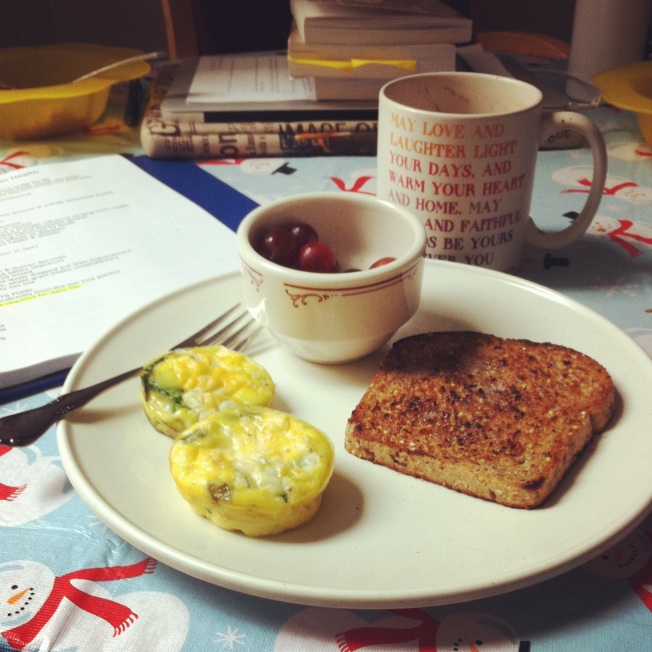
This morning (yes, the procasti-baking continues!) I whipped up a batch of mini veggie frittatas. They’re a fantastic breakfast to make if you find yourself with excess eggs, meal swipes, and limited funds. I figured that I should probably take a sweets break and use the remainder of my eggs for something savory. Instead of buying vegetables, I used a meal swipe for a simple spinach salad topped with roasted asparagus, red peppers and caramelized onions. To be honest, I’m getting pretty tired of dining hall food. And one cannot survive solely on salads, right? I recommend eating these mini frittatas with a slice of buttered whole-grain toast and a side of fruit. It makes for a wonderfully balanced and delicious breakfast–or dinner, if you’re into that sort of thing. (Sidenote: I fully support breakfast for dinner.)

IMG_1886

This will probably be my last college post before next semester. Georgia has finally returned and I can’t wait to start cooking with her again over winter break.

Happy holidays, everybody! And remember: procrasti-baking is completely normal.

Mini Veggie Frittatas
Makes about 9

5 eggs
1/4 cup milk or cream
1/2 cup chopped veggies
Salt & pepper, to taste
1/4 cup shredded cheese

  1. Preheat oven to 350. In a medium bowl, whisk together whole eggs and milk. Stir in chopped veggies and season to taste with salt and pepper.
  2. Butter or oil 9 regular-sized muffin tins and fill about 2/3 with the egg mixture. Top each with shredded cheese.
  3. Bake about 15-20 minutes, or until centers are set.

Note: for my frittatas, I used skim milk, roasted asparagus, peppers and caramelized onions and shredded Mexican blend cheese. Feel free to experiment with whatever veggies/protein/cheese you like! I also love making these with spinach, sun-dried tomatoes and feta cheese. The frittatas are also a great make-ahead breakfast; you can refrigerate and re-heat these babies in a microwave or oven.

IMG_1881

Chocolate Olive Oil Cupcakes & Hurricane Sandy

Standard

As many of you know, Hurricane Sandy recently ripped through the east coast and did some considerable damage. Much of NYU, including my dorm, has been left without electricity, so I am writing this from my roommate’s home. I am so thankful to be somewhere with electricity and hot water and send the warmest of thoughts to my friends and fellow New Yorkers who have been affected by the storm and remain in the city.

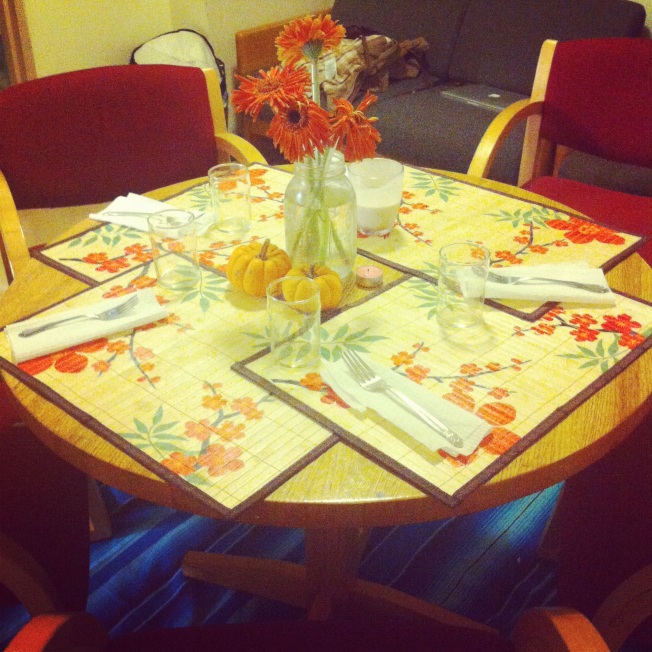
Pre-Sandy, it was my suitemate Becca’s birthday. On Monday we were all quite excited because classes were canceled and we had time to put together dinner and dessert for the birthday girl. Little did we know, Sandy would reach us later that night and knock out our electricity and turn much of Lower Manhattan upside-down. Thankfully, we were able to have a lovely evening of good food (spaghetti with homemade meat sauce and cupcakes which I will tell you about very soon), good laughs and good company.

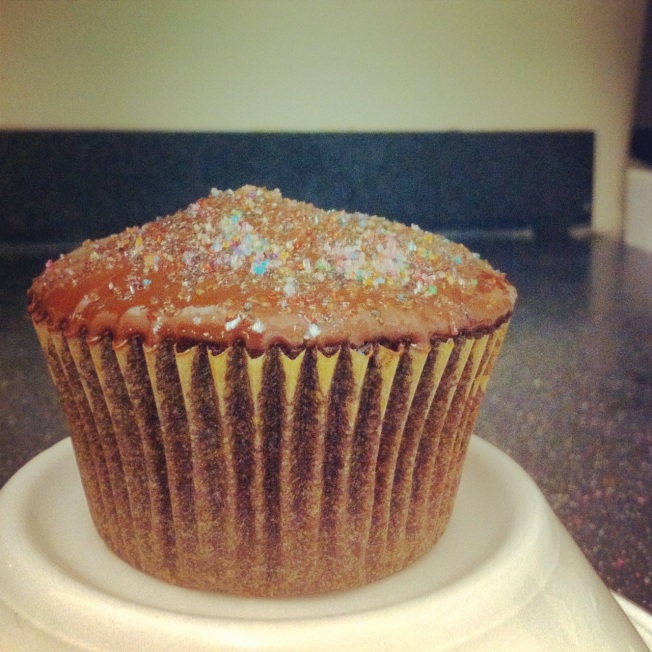
As I have mentioned before, dorm cookery is a bit difficult because our ingredients are limited. I’m not sure why I have only procured olive oil and refuse to buy vegetable oil. Perhaps some part of me thinks olive oil is more useful, even though I typically find myself baking in the kitchen? Who knows. Because our kitchen is devoid of vegetable oil of any kind, I substituted olive oil for vegetable oil in the chocolate cupcakes I made for Becca. I was a bit nervous about the outcome, but I am happy to report they tasted great and nobody noticed the vegetable oil stand-in. That being said, I waited until after the cupcakes had been devoured to share my secret, lest someone be turned off by the thought of savory olive oil in her baked good.

The recipe I used is a one-bowl cupcake recipe from Sophisticated Gourmet. Anything one-bowl is fantastic for a cook in a small kitchen, because it means fewer dishes to wash. Boy, do I miss the dishwasher.

To top off the cupcakes, I made a quick ganache, mostly because I lack an electric mixer and so it would be nearly impossible to cream butter and powdered sugar together. The ganache was quite easy and tasty—just melt some butter and chocolate together and you have a delightful cupcake-topper! And of course, because this was a birthday, I had to douse the cakes in rainbow sugar. The un-frosted cupcakes (Becca doesn’t like frosting) looked beautiful with rainbow sugar.

If you want to make a knockout chocolate cupcake with little effort, definitely try this recipe. I would recommend using dark chocolate cocoa powder to amp up the flavor.

Hope you all have a good weekend, and if you were affected by Hurricane Sandy in any way, I hope for the quickest of recoveries.

Chocolate Olive Oil Cupcakes
Adapted from The Sophisticated Gourmet
Makes about 12 cupcakes

1 cup granulated sugar
3/4 cup + 2 tablespoons all-purpose flour
1/4 cup + 2 tablespoons cocoa powder
3/4 teaspoon baking powder
3/4 teaspoon baking soda
1/2 teaspoon salt
1 egg, room temperature
1/2 cup sour cream or plain yogurt
1/4 cup olive oil
1 tablespoon vanilla extract
1/2 cup boiling water

  1. Preheat oven to 350. Line muffin tins with paper liners.
  2. In a large heatproof bowl, whisk together sugar, flour cocoa powder, baking powder, baking soda and salt. Add the egg, sour cream, olive oil and vanilla and stir until combined. Pour in the boiling water and mix, starting from the center and working your way outward. The batter will be watery; this is normal.
  3. Bake for 15-19 minutes or until a toothpick inserted into the center of a cake comes out clean.
  4. Transfer cupcakes to cool on wire racks for about 10 minutes. Cool completely before frosting.

Dark Chocolate Ganache
2 tablespoons butter
1/4 cup dark chocolate chips

In a double boiler, stir butter and chocolate until completely melted. Let cool at room temperature before frosting the cupcakes.

I should also mention that while my roommates and I were stranded in our dorm room, I made some pumpkin spice steel cut oats for dinner by the light of my iPhone. I never let the dark get in my way. Photo credit to the lovely Becca. Please excuse the silly face.